In most any quest one is more likely to find Tech Duinn than Tir n mBan or Kêr Iz. Only in stories is anyone, normally a hero, able to win a prize, earn a skill, or achieve much without effort. Even there the best efforts can fail—for every Gawain there is a Connla. [1] Not all effort is the same. Not everything is up to us. We can direct energy in the wrong direction, and so it’s worth pondering how we can best apply ourselves so that we don’t waste time or energy (all other factors notwithstanding). The importance of this goes beyond how we train and into how we lead our lives, into what battles we choose to fight, what company we choose to keep, and in what pursuits we direct our efforts. Everything.
I took as the motto for this school a line from F.A. Marcelli’s Rule of Fencing (1686), vis enim vincitur arte, “For force is conquered by art,” not because power doesn’t have its place, but because without art power only does so much. One may be a powerful speaker, but without some skill in rhetoric any speech will suffer no matter how passionately one delivers it. In the same section, Marcelli shared a Latin rendering of the first two lines in Hippocrates’ Aphorismi, Ars longa, vita brevis, that is, “the Art is long, life short.” [2] The cipher I adopted for myself (see image just below) I made from two bits of clipart (one must be mindful of intellectual property rights)—a skull argent, affronté, crowned, trisected by spada, sabre, and foil—and is meant to capture this notion, that is, that the Art is eternal and we are not. It plays well with the usual memento mori aspects of this specific charge. I noticed another fencer adopt it, a chap in Italy I believe, and if it speaks to him too, great.

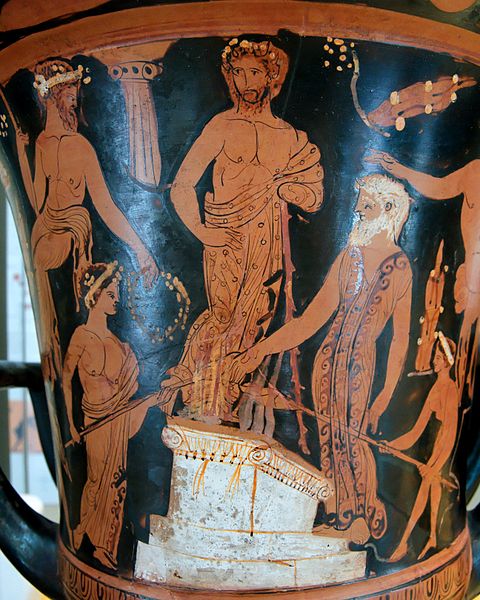
For me, there is a lot that this cipher encapsulates. We only have so much time, so we should use it well. We should face the Great Question as bravely as we face an opponent: eyes forward, devoid of emotion, and ready. Whatever the weapon (the three stand for all) we should be ruled by the Art and the respect and discipline it teaches. If we want what we do to matter, if it is to matter, then we must embrace that journey without simplistic expectations about the outcome or too much concern about how it will be received—we focus on the work instead. We focus on the Art, less so our experience of it. This is easy to say, but much harder to carry out; so, mindful that death wins in the end, that nothing comes without struggle, and that we should consider how we want to be remembered, we press on despite setbacks, criticism, or failure. Failure, after all, is just another teacher.
It’s difficult sometimes, and natural to ask, whether we’re wasting our time or effort. We should ask this frequently. We can’t always know when we are wasting our time, especially without a skilled coach or similar insight, but there are a few areas this tends to go wrong and that are worth monitoring. Unqualified to give anyone life advice—not like I’ve figured my own out yet—what follows focuses on a few aspects of the Art where we tend to go wrong.
Attribute vs. Technique Fencing
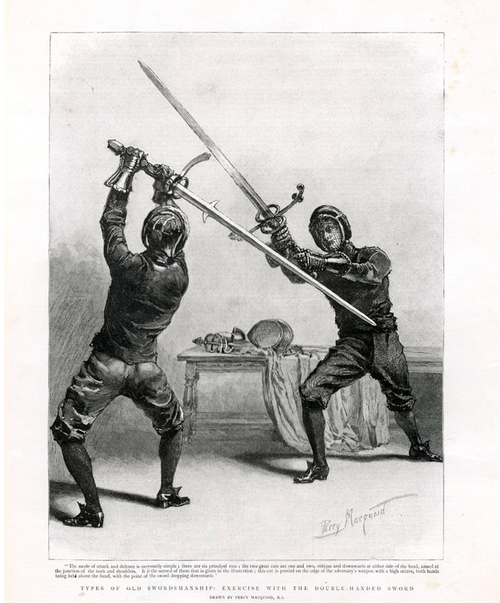
One area we see misplaced effort is in forcing through an action. It’s not that this didn’t happen—we can be pretty sure it did—but in and of itself relying on one’s strength, or speed, or reach only brings short-term benefits. Two caveats. One is that competitive “HEMA,” like it’s sibling Olympic competition, will sustain an attribute fighter or fencer a long time. At present it will serve one longer in HEMA, because there are fewer truly skilled fencers who compete. [3] I am not against tournaments—they’re fun—but they have garnered more weight than they should have. I’m not the only person who believes this; as Matt Easton and Mark from the Exiles recently commented, the goals, training, and attitude toward the Art differ across the historical fencing spectrum. As unpleasant as this may sound, success in competition may correlate with a high degree of skill, but it doesn’t have to; in fact, in general all one needs is the need to do well and a deep degree of commitment to each fight, each blow. Olympic is no exception. [4]
Second, there are situations, particularly in mixed-weapon settings, where differences in weapons tell. A recent example of my own was fighting with a friend, Josh Campbell; he was armed with a 3+lb (1.36kg) baskethilt; mine, a later period model, weighs in at 2.36 lbs (1.072 kg). One head parry I took I didn’t take at the right distance and the mass of the other weapon easily defeated my defense. I only bout full-tilt with people of appropriate skill and control—I can’t afford to be injured—and this man, strong as he is, is able to stop a blow on a dime. The touch was his—yes, I had “parried,” but insufficiently, and had the fight been in earnest that blow would likely have ended it right there. Using one’s natural abilities is not wrong, but the best fencers combine those gifts of heredity with technique and understanding. This is true regardless of the person. In the example above, Josh could push through most any blow he wants, but he doesn’t—he knows that he needs to let the sword do its job, he knows to use its weight to save him effort, and in situations where the mass of that weapon will overwhelm he has the control to moderate force.
As another example, height and reach can be a boon, but so too can the lack of it. A good coach will help each fencer develop those inborn abilities in conjunction with the technical repertoire both learn. When I am teaching a shorter fencer, even at the outset we discuss things that are not going to work against a much taller opponent. If fencer A is 4’ 5” and B is 6’ 4,” and B launches a head-cut, A can use parry 5, but will likely need better measure to create an angle that keeps them safe. Moreover, A probably shouldn’t riposte to the head—they’re at a disadvantage there. The lower lines are a safer bet as they’re closer to A and harder, generally, for B to cover as quickly. B, on the other hand, can more easily target the high lines and extended target—going for a leg shot against A, which is daft for a variety of reasons, is more so given the height difference. [5]
Drilling
The famous line attributed to Bruce Lee about kicks, “I fear not the man who has practiced 10,000 kicks once, but I fear the man who has practiced one kick 10,000 times,” highlights the importance of meaningful drill. If we practice something unimportant or incorrect 10,000 times, all we do is hone a skill we don’t need or which we should be using differently. One of the arguments for a capable instructor or sensible study group is that it’s so easy to go wrong and guidance can help prevent that. There are, sad to say, people out there who have been at all this a very long time, and yet have extremely little to show for it. It’s hard not to feel pity for people in that plight, especially when it’s public. To have devoted so much time, energy, and passion for so long and to have so little to show for is unfortunate. It is, however, fixable.
For historical fencers, any drill or exercise beyond typical warm-ups or well-known conditioning routines should rely heavily on whatever source or sources one is using. Those drills connected to using measure, footwork, tempo, or other universals should be in play, but may differ by weapon. One uses different footwork for longsword than smallsword, but both require one to be able to move in any direction; both employ different categories of measure; and both exploit tempo. If your group or coach isn’t having you work on universals, that’s a problem. So too are any of the “bullshido” sorts of drills. What are these? One example, for footwork, I experienced myself. In one class I tried (but left), the instructor insisted that one land demi-pointe in the lunge. Nothing in the corpus supports this idea—no lie, I’ve looked—and when questioned he just got angry. [6] Other common examples include too much focus on speed, hardness of a blow, and drills that train actions that run counter to universal principles and/or one’s source.
Another common problem, but not strictly bullshido in nature, is the type of drill that comes from a source but which is a dead-end. Another example from the same instructor was his use of the stick drill in Henry Angelo’s Infantry Manual (1845). It makes sense as a reminder of the author’s numbers for cuts and guards, and as a warm-up perhaps, but I never saw him go beyond that save to one other set-drill. In all the times I visited that group over a year the only thing they ever covered in their two hours of class consisted of those two drills. Every practice… Fencing instruction is progressive, not static. If you are still doing the exact same drill the same way a year later, and that is all you’re doing, that’s worth examining.
Yachts in Kiddie Pools
HEMA is riddled with people who shouldn’t be teaching. There is a difference between the most experienced person running a study group in some isolated place and the person with a few years’ experience who just decides they are good enough to teach. It can be subtle. The former teaches because it’s the only option; the latter teaches because their self-worth needs dictate that they must teach to feel legitimate and/or be seen as such. There is grey area in all this too.
Selecting an instructor is difficult sometimes. Personality fit, distance, and time conflicts are one thing, but among the trickier issues is assessing what experience means. Like effort, not all experience is the same—seven years of this class or that, some tourney wins, and a big head do not an instructor make. They “can,” but it all comes down to how those years were spent, the quality of that experience. Because HEMA at large lacks sufficient time in the saddle, because the average level of understanding and ability is so mediocre, not only do we see more run of the mill fencers attempting to coach, but also a concurrent disdain for actual training. Not everyone can manage being shown up, and since many of HEMA’s popular darlings enjoy the modicum of fame they’ve run into, anything that might chip away at it is unwelcome.
If you want to teach, if you’re drawn to it, great, but do it right. There are a number of ways to do this. One is to work with an established, well-respected, and viable program. I’m happy to suggest a few. If these options are unavailable for some reason, then reach out to a teacher of recognized skill. What does “recognized” mean? Good question. Assuming someone is out there teaching what you want to pursue, a few ways to assess them include
- their relative experience (how long have they been fencing or studying that topic?)
- their training (what training have they had? Where did they obtain it? How is it regarded outside its own circle?)
- the quality of their research if they’ve conducted any (did an academic journal publish it or a personal website? Was it peer-reviewed, and if so, who are those peers? How does it read? How solid is their support? Their thesis?)
- teaching experience (where and whom have they taught? Have they been asked back? Have they taught both beginners and advanced fencers? What do other teachers think of them?)
- are there reports of inappropriate behavior or red flags as teachers (condescending, dismissive, abusive, etc.) [7]
These are general categories, so general that depending on how one assesses each of these even some of the worst instructors will likely make the cut. Popular doesn’t necessarily equal excellent. I don’t care to name names, and won’t, but I know some teachers who are hands down the best in their field who do not travel widely, do not have an entourage, or post a billion videos of themselves; they are people any one of us should hope to work with at least once. Some names are easy—if I ever have a chance to take a class with Chris Holzman, Dave Rawlings, Francesco Loda, Christian Tobler, Jess Finley, Tom Puey, Kaja Sadowski, Manouchehr Khorasani, or Da’Mon Stith (again) I will jump at the chance. Whatever it is, I will learn something, I’ll be challenged, and with luck grow. As a final consideration, the best teachers I’ve known may have known they were good, but not one was a braggart; in fact, I know a number of gifted teachers that constantly question their ability. Painful as that is for them, it indicates that they take the job seriously and want to do it right. The feel the weight of the responsibility that comes with teaching.
Research
I’ve covered this often and thus will be brief. There is good research, and there is poor research. Some practitioner’s Youtube video is likely going to have less weight than an article vetted by a peer-reviewed panel, an established historical authority or fencing master, or a well-respected translation of a key source. If that practitioner happens to be a maestro; if it’s a trained historian, archaeologist, or museum curator; if it is one of the handful of long-time historical fencers who have earned the authority that these others assign to them, then you’re on firmer ground. Naturally there are exceptions.
Anyone can be on Youtube; anyone can print a book; anyone can claim any number of things, but that doesn’t mean that what they have to say is worth considering. Lucky as we are to enjoy a period like that initial boom after Gutenberg with our on-demand and self-publishing, we get all the downsides too. For every Vasari’s Le Vite de’ più eccellenti pittori, scultori, ed architettori (1550) we also get far too many Nostradamus’ Les Phrophéties (1555)… It pays to be cautious.
All this Time Wasted—now What?!
What do we do if we realize we’re on the wrong track? What if one realizes one day that their coach only knows the first two pages of a manual or that they’re teaching something counter to all received knowledge? What if we realize we’ve used a bad translation? The good news is that when we realize we’ve wasted our time, on anything, we can stop and reorient. Jump off the wrong track and find the right one.
It’s become a commonplace to quote Edison about lightbulbs, but it holds: the years one may have spent pursing the Art in less effective ways are not wasted, not if one uses them. They amount to firsthand knowledge of what doesn’t work, and that becomes armor against future missteps. Even the awareness that it’s possible to land with a dud of a coach or use a bad interpretation affords some protection: it makes us more careful.

This discovery can be traumatic, deeply upsetting, and disorienting. Sometimes we need to sit with that disappointment for a while. To use a west coast analogy, it’s like being hit by a wave while surfing: one is knocked off the board, dragged underwater, and yet one doesn’t fight the wave; one lets it pass and then comes up, pulls in the board, and starts over. If one loves surfing, then one doesn’t quit, but tries again. It’s the same with fencing, with the Art. We will meet disappointment in many forms; that doesn’t mean we have to like it or quit. These are just moments of clarity, punctuated instances where we can actually see progress, funny as that might sound. These are the segues between levels of understanding, between jumps in skill, at least they can be if we use them as such.
NOTES:
[1] Tech Duinn, the House of Donn, is one of the Irish “Otherworld” locations, but has strong associations with death, Donn being the ruler of the dead in some accounts. Dursey Island, off the Beare peninsula, County Cork, Ireland, has often been linked to Donn’s House. Tir n mBan (“Land of Women”) or Kêr Iz (Breton, “City of Ys”) both refer to other popular versions of the Celtic Otherworld, the first in voyage tales like Imram Curaig Maíle Duín (The Voyage of Máel Dúin), the second in several Breton sources. Gawain, one of the knights of Camelot, is famous as the opponent of Bertilak, the Green Knight, and Connla, a son of the Irish hero Cú Chulainn and Aife, one of the two masters who trained the hero in Scotland. Connla dies fighting his father who only too late realizes that the conditions he left with Aife for the boy led to the child’s death.
[2] Francesco Antonio Marcelli, The Rule of Fencing, Book 2, Ch. 1, 55-56 in Holzman’s translation. More and more this book is one of my absolute favorites.
[3] I’ve discussed the issues around tourneys a lot. I do so because a) I actually like tourneys and b) hate seeing them conducted poorly and/or misinterpreted as the litmus test for skill.
[4] The drive to win, the self-worth need for it, will sustain a person a long time. I’ve observed this so many times in both TKD and in fencing (of all sorts). Our mental state in a fight will more often determine success than skill, because skill doesn’t work on its own—it requires a brain to make it work, and the calmer, more determined that brain, the better that skill presents. This is why at high levels of competition, where both skill and mental fortitude are stronger, skill can play out in ways that we do not see with beginner or intermediate fighters. This said, even skilled competitors can and do resort to theatrics to win when they arguably should not (e.g. certain bouts in women’s sabre, Athens, Summer Olympics, 2004).
[5] Yes, attacks to the leg are present in historical sources, but usually taken out of context and over-used. They make very little sense in the setting of a duel save where the height between the two opponents is so great that the shorter fencer might strike the legs more safely.
[6] The demi-pointe lunge, as I call it, has been the subject of my research this past year. I’ve spent probably way, way too much time on it, but with luck it will put the kibosh on this ahistorical practice.
[7] I’ve not been specific here to avoid unnecessary unpleasantness with those sections of the community who put their faith in the very people I’m saying one should avoid. The greatest hurdle in assessing any teacher by these rubrics is that each one can mean something different to someone else. What I think constitutes solid research is different than someone who hasn’t had my training; it’s why I believe in vaccines, it’s why I see racism as a current rather than historical problem, and my I lament the rise of the ancient-aliens method of [cough] “thinking.”
The training I think makes a good fighter has a proven track-record, an established and venerable pedagogy, and reams of supporting literature. This is why five years spent with a qualified epee coach means more to me than five years one has spent with JoJo the Knee-Hammer whose school mantra is the HEMA equivalent of Cobra Kai—the former will teach one universals that can be applied across weapons and periods. JoJo might stumble into some universals, but JoJo also doesn’t care about universals. JoJo thinks that wimpy sporty stuff is for dorks.
My idea of a good teacher is one who seeks to help one grow and actually has the ability to make it happen. A good teacher knows their own limitations and when to send a student onto someone more skilled or appropriate. They support, push, encourage, and set an example to follow. A good teacher doesn’t put down a student, doesn’t embarrass them, and doesn’t beat them up. A great teacher seeks to create students that surpass them. Generally, that teacher has some legitimate teaching; they’re not just the “best” fighter in their little mix of merry men, a mix they are careful not to leave lest their status be called into question. Good instructors remain students, remain open to growth and improvement, because they recognize that there is always more to learn, things to improve or fix, and that no one ever, ever masters it all. A good teacher also supports other teachers, helps them, and accepts help from them, and is willing to lose students to them if that student would be better served by another.
[NB: there are plenty of well-trained teachers who are duds too, I know, and I’ve worked with a few myself, but that fact doesn’t negate the value of solid training]