Tag: french fencing
Coaching Footwork
Coaches use a variety of types of footwork and positioning when teaching. Watch a typical Olympic lesson and you will notice quickly that the coach isn’t necessarily on guard, but more often than not standing. Rather than advancing and retreating they are walking. The reason for this is obvious, or should be, but a lot of people new to coaching do as they were taught and use the same footwork they do when fencing. That isn’t wrong, and in fact, most coaches will drop into those positions when necessary too, but they rarely stay in stance the entire time. The reason is that it’s fatiguing, especially over the course of the day.
If one is teaching a single solo-lesson, then walking steps and a more upright posture are less critical, but even there it can be helpful. If one is teaching multiple students in a day, then sparing one’s body is all the more important. Fencing is all about repetitive motion, and over time, especially over decades, some of that motion takes a toll. We can reduce wear and tear, as well as fatigue, if we take a few steps to make it easier on ourselves when we teach.
Walking Steps
I’m starting with walking as it can be the hardest to adopt, but also because most other changes follow naturally from it. Yes, walking. It was hard for me initially to walk rather than advance and retreat, not because I struggle with it physically, but because I wasn’t sure just when I should use it. For warm-ups and cool-downs walking is more natural, so start there—if you begin with wrist picks/arrests, stop-cut parry/riposte, disengage and thrust, etc., these are good times for the coach to walk versus adopt a proper guard.
In some drills one may walk as well—context is a good guide. If one is demonstrating aspects of the lunge, then it makes sense to adopt a proper guard, use appropriate footwork, and lunge as one does. This said, the coach in most other cases can substitute walking for all of this—for the lunge, we might just walk a bit faster.
Surface & Terrain
Generally, fencing is an indoor activity, and in Olympic circles almost always, but in historical fencing for a variety of reasons we are often fencing and teaching in mixed environments. If you have the good fortune to work indoors, and have proper flooring, such as wood, the springy artificial rubber stuff I don’t know the name of, or the like, then terrain is less a concern.
If you are outside, however, the coach has to take into account how terrain will affect both how they move and how the student does. I use these opportunities to expand what a student might find comfortable. Practice on gravel, sand, grass, blacktop, or concrete will test one’s mobility, balance, and endurance. Work accordingly. So, if your lesson is on a slippery surface, work on tighter footwork (cross-steps are good), and shorter lunges. If on super hard surfaces, such as concrete, make sure you include more frequent breaks, and depending on the type of fencing, limit anything that will mean more concentrated impact. When on concrete, I do not include as much footwork in the warm-up portion, for example.
Ambidexterity
Not everyone develops the ability to fence with their off-hand, but it’s something I encourage. Not only will it help you as coaching those in class who are in the minority handedness-wise, but it also provides the coach a break. When the dominant arm starts to tire, one can switch. After a time, it’s easy to forget which side one is using, and in that case changing more regularly can help balance out things.
Being able to move, to use footwork with the opposite side, also helps. The muscles etc. engage differently, and allow those on the dominant side a chance to work less strenuously. As a perk, one is far less likely to develop one side of the body overmuch.
Breaks
It may be obvious, but the coach shouldn’t be moving, let alone fencing, the entire time. Take breaks. It is not always easy to do, but they’re vital to focus and the longevity of one’s teaching career. We are not necessarily conditioned to do this; often in fencing we’re under pressure or feel that we are, and so will push on when we should not. To use myself as an example, a few years ago at a weekend coaching clinic at Halberstadt Fencing Club in San Francisco, Maitre Handelman approached me and told me “Take a break.” Both myself and the other not-young instructor had been going all day, and it was starting to tell in how we moved. We sat down, mutually lamented the horror of aging, but we did as ordered. I don’t think I could pick one thing that Matire Handelman shared as a favorite kernel of wisdom—he’s a consummate teacher and one of the best I’ve met—but this aside has stuck with me. Until recently, I was teaching every day, and had I not followed this sage advice, I’d be in worse shape than I am.
Take breaks between lessons, take them between classes. Right now, with only a three-hour block to teach on weekends, there is no gap between the three sections. So, what I do is use the footwork drills we start with to rest. In a class, and mine are mercifully small, the coach normally circulates between pairs as they work through drills, and depending on the walking surface this can be a long time to stand. When you can, sit. When you can, stretch.

Pacing
Just as we can with traditional fencing movement, we can speed up or slow down when walking. I was surprised at how much walking can affect distance, but it can, so some adjustment may be required in order to chase a student or retreat in turn if walking. This is stating the obvious, but it’s worth mentioning because if we’re not mindful about it students attacking can be in grappling range super quickly, and in attacking them it’s easy to feel like they’re sprinting away from us.
Benefits of Coaching Footwork
To explain this I’d like to point out, again, that fencing is one of those pursuits that many people pursue into their later years. This isn’t just as participation or a movement exercise–there are competitors who are elderly; coaches who teach all the time. They FENCE.
The reason they are able to do this is, no doubt, partly owing to the luck of genetics, but it’s also because most have taken care of themselves. Even if you come to this late, as I did, it will save you some hassle down the road. Having had the pleasure to learn from and compete against people decades older than I am, I know firsthand just how formidable these folks can be. The worst thrashing I ever experienced in competition was against an 80 year old man when I was 23. Al Couturier, who at the time was in his 70s, enjoyed turning on the speed during lessons as we cooled down–soon as we saw the smile in his mask and his arm take on a life of its own, we know we would be parrying like mad. It didn’t matter–he got us each time. Maitre Calvert was in his 90s when I worked with him, and would sometimes, in foil, pull off a behind the back shot as illustrated in Angelo. More recently, during my master’s exam, I had the pleasure to work with Grand Master Josef Šolc, who is 90, and can lunge a lot farther than I can and recover just as quickly. These elder fencers remind us of what is possible.
We can do it too, if we’re lucky, but that starts with taking responsibility for ourselves, setting a good example for younger fencers, and in managing our time, bouting or teaching, well.
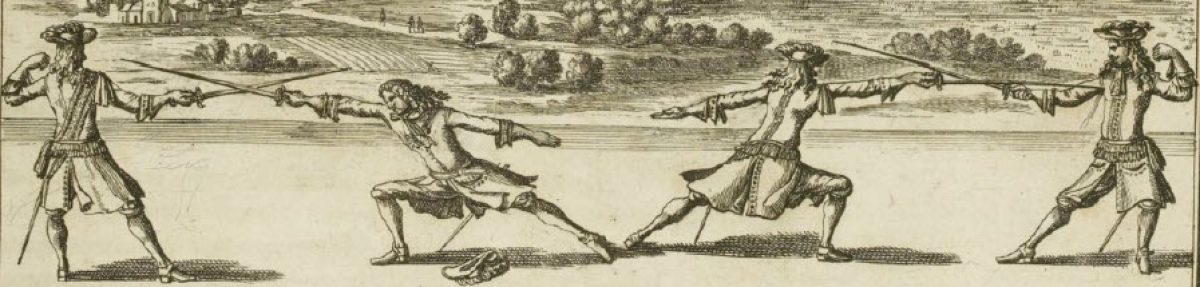
A Note on Liancour’s “Five Principles” plate in _Le maistre d’armes_ (1686)
Liancour’s 1686 Le Maitre d’Armes presents a plate with five figures, each of which illustrates core principles of his approach. So far as I am aware, no one to date has pointed out that the descriptions and images for figures four and five are reversed. It is a minor point, perhaps, but important when reconstructing Liancour’s method. Historical fencers rely heavily on text and plates (when the latter are present), but in this case they may be confused and juxtapose these two core actions.
Ft. Ligonier French Fencing Weekend

I’ve been meaning to write something up since I returned late Tuesday, but between work and an unexpected veterinarian adventure, I’ve not had time to do this event justice. It was, in a word, amazing, and so much so that I truly hope it becomes a regular event. Patrick Bratton and team put on one hell of a seminar–it was not just the classes, though those were great, but that the setting was apropos and unique, we had behind-the-scenes access to some of the museum, and ample chances to eat, laugh, and get to know one another. Yes, we also fenced, or many did–it was all I could do not to break my doctor’s orders and jump in, but for once I was a grown-up about it (and appropriately as bitter as a toddler told “no”).
By most definitions, I don’t think people would consider me particularly “lucky,” but when it comes to finding myself at truly impressive, informative, and fun events, I’m as rich as Croesus. To the list of favorites–SabreSlash, The St. George’s Day Exhibition of Arms, Rose and Thorns Historical Fencing Symposium–I can now add a fourth, Patrick’s French Fencing weekend. One reason, beyond the obvious draw of all things hoplological or fencing-related, is that it combined three branches of the community: historical, Olympic, and reenactment. The benefits of such cross-over should be obvious, but may not be, so to illustrate this I cite the example of a fascinating chap, Matthew Schlicksup, an artisan of historical footwear currently working at Ft. Ticonderoga in New York.
Historical Artisans
Matthew makes historical footwear, among other period items, and is a master craftsman. Trained in Williamsburg, Virginia, he has made shoes, attended events, and conducted research that most of us might not think about, and, despite the fact we all wear shoes. We take them for granted. Ft. Ligonier, however, has the world’s largest collection of period shoes thanks to the accident of 18th century castoffs and the powers of anaerobic preservation. An archaeologist in initial training, Matthew brings science to his craft, and with impressive results.

This weekend he shared, and wore, his version of the fencing shoes or sandals depicted in de la Touche’s seminal treatise, Le vrays principes de l’espée seule (1670). So, here we are at an historical fencing seminar with a man who makes shoes from the period for that very purpose. This may not seem important, but it is. A few years ago I spent considerable time researching the development of the lunge and this included a look at footwear–would that I had known Matthew then! In discussion with him about de la Touche’s sandal, I learned so much more than I might have, not only about construction, but also about how such shoes function. Put simply, this was a window into period fencing via a single often unconsidered artifact.
Museum
Our host at Ft. Ligonier, Matthew Tristan, was accommodating, supportive, and generous with his time. It was he who gave us the behind-the-scenes tour. It says a lot that he and the foundation were open to having us there: a busy historical site and nuts with swords sounds like an insurance adjustor’s nightmare. With Patrick and others in period dress, and quick to chat with visitors, it went well and we hope added something to the experience. When trusted with the safety of the site and its guests, one wants to do all one can to make it go well, and under Patrick’s excellent leadership this was not even in question. With all the discussion of clubs losing insurance because of unsafe and/or stupid activities, with some unfortunate high-profile legal cases, a win like this is easy to dismiss. We shouldn’t–this was a success and a sign that things can be done correctly.
Classes
In terms of classes, I participated as much as I was able–stupid injury maintenance–but was super keen to see what Justin Aucoin did with the work of Charles Besnard, one of my favorite masters. Justin has long experience with fencing and the SCA, and runs a seriously fantastic class. People loved his classes. I loved his classes. He taught one on Besnard and a second on the bâton à deux bouts or French double-spear in Pascha. I had been looking forward to meeting Justin for some time–Patrick spoke highly of him, I liked what I saw in his videos, and he is a die-hard fan of Dumas and The Three Musketeers, that last fact which immediately endeared him to me.

Justin combines deep knowledge with obvious skill and a passion for his topic. It’s infectuous. Moreover, he works with a diverse student population–always a good sign–and so was quick to suggest work-arounds and ideas to make each thing he covered work for different folks. If he is teaching anything near you or you have the chance to travel to work with him, do.
Bridge-Building
I tend to gravitate towards and work with other folks interested in bridge-building. It’s not just the strengths that collaborative work brings, but the sort of people that go in for it. Among these, I have worked most often outside my immediate surroundings with Patrick. He is, quite honestly, a model coach and advocate for what we do. As a trained teacher (he’s a professor at a college in Pennsylvania), researcher, fencer, and man of eclectic and fascinating interests, from vintage fashion to hunting lore, Patrick perhaps more easily combines disparate strings together to make a viable tapestry.
The historical reenactment group he is involved in, a detachment of mid-18th century French marines, has worked at Ft. Lignonier, among others, before, and it was an ideal location for a look at several late 17th century fencing masters. Some students were in costume, some not, but the addition of period appearance added a lot. Having good relations with the museum staff meant not only a chance to hold the seminar on site, but also see parts of the museum most people do not see. The historian and former archaeologist in me was seriously thrilled about that, but I wasn’t alone.
The only other event that I have attended that combined all these elements so successfully was my mentor Master Michael Knazko and company’s SabreSlash–we had fencers from all walks, reenactors from Krakow (17th Polish hussars), and tours of various sites within Prague relating to fencing (among other historical subjects). In both cases the camaraderie was the finest.
A Model for Future Events
Until recently, until this latest trip actually, I had planned some invitational tournaments. Now, while there may be a tournament element, I am planning to put together something closer to what Patrick and Maestro Knazko have done. It’s a good mix–class for those who like it, some history and other activities (we ate well for example), and some fencing or lessons. It is my hope that Patrick makes this event a regular one–we’ll be lucky if he does.

New Year, New Approach

For some time now I’ve tried to “go with the flow” rather than attempt to establish some ideal approach to the club. This tends to help me to help those who want or need it, and, introduces me to a wide variety of opportunities I might not have had otherwise as well new people I might not have met.
A new day-job has forced me to make some significant changes, and has restricted my availability far more than I anticipated. I’m not happy about that, but rather than whine about it the more useful thing to do is adapt, so, I’m adapting.
What Changes?
First, the name–henceforth I’ll be using the name an affiliate program has used to date, Capital Escrime Historical Fencing, because my adult program will be shifting more toward this group in Salem than the meets-sometimes-group in Newberg. For the Newberg folks, you are not only welcome, but encouraged to join us in Salem (it’s a 30min. drive).
Second, while I will continue to teach sabre, I will not be taking any new sabre students at this time. Instead, I will focus on smallsword and “transitional” rapier as presented by Charles Besnard (1653). To my friends in the Italian tradition, please do not take this as a snub, because my love for Marcelli, Radaelli, and others is still strong, but for sabre in particular I need a break so a few injuries will heal.
Third, the Newberg group will meet, but every other week; I will meet the Salem group in the weeks between. See “For Current Students” for more details.
Salem Location
An old friend and fellow fencer, Moses Jones, has kindly invited us to share his space at his school, Seize the Vor [https://www.seizethevor.com/]. His school meets out of Iron Phoenix Athletics, and is just off of I-5 in Salem. Moses and I have a LOT of plans, and while the change-over might be a bit rough, there are good things to come.
For Those Upset by the Changes
I know that this will not work for everyone, and I’ll be sorry to see anyone go, but if possible I should like to help those for whom the new schedule/location doesn’t work find a good spot. There are a few decent options for historical fencing in the greater PDX area, and a lot of solid Olympic schools. Please chat with me and we can work something out for you or you child.
What _is_ “Transitional Rapier?”

An extremely clever and well-read chap I know, let’s call him “Mr. B.,” has more than once said that he believes the next “big thing” in historical fencing will be “transitional rapier.” Certainly there are signs that this is true–rapier, ever popular, thrives, but the smallsword community is growing and with it, in time, will come those who want to know how rapier led to smallsword.
In an offhand way, I often refer to rapier as a sedan and smallsword as a sports car, which is to say that (eschewing linear progression) the smallsword appeared largely because some people (not all) grew tired of the longer, sometimes more cumbersome rapier. There are a number of amusing anecdotes from the 17th and 18th centuries about swords tripping people up, becoming a nuisance in a cafe or shop, and the smaller weapon, while it can certainly be a pain to wear, was less of an annoyance in public spaces if not when sitting down, mounting a horse, or at court. [1]
Defining just what is a transitional rapier, and the dates that surround it, is challenging. Like most things in sword development and change over time, the dates are best used as guides rather than firm start and end points. To save others time, I examined a few places that discuss this–there is much more to read on it than I present here.
Egerton Castle, a Victorian scholar of fencing, whose interpretations have often been found wanting since his time, on the one hand delineates a “transitional period” well, while also muddying the waters of sword classification with his take on the “flamberge” as only Victorians could:
The seventeenth century–during the first half of which was accentuated the distinction between the military weapon, or sabre, and the walking sword, rapier, or small sword–is essentially the age of transition.
The simplification of the rapier consisted in the almost universal adoption of the cup or shell hilt, the gradual reduction of its dimensions, and the elimination of complicated counter-guards. It is observable that about the middle of the century the cup hilt becomes very shallow, and in the shell hilt the shells open out more and more. The simplest form of the transition rapier may be described as consisting of quillons, knuckle-bow, and pas-d’âne, surmounted by either a shallow cup or two plain shells. In fact, there is very little to distinguish it from the small-sword guard except its larger dimensions. [2]
In broad outline this holds up well, though there were other sorts of military swords in use, and some people continued to use previous styles of rapier. I left out his discussion of the “flamberge,” what Ewart Oakeshott among others refers to as “dish-hilt” rapier. The former term can be confusing as it referred to a variety of swords. E.D. Morton, in the Martini A-Z of Fencing, defines the flamberge as:
A somewhat imprecise term; originally it indicated any large sword, especially of the two-handed type. Yet the term was used contemporaneously, and for long afterwards, to describe a blade of the way, snakish, variety. Towards the end of the sixteenth century, the word acquired a very different significance. A flamberge was understood to be a slender-bladed rapier, with a greatly simplified hilt consisting of a cup and quillons only, but without rings, knucklebows or other accessories. Finally, in the days of the small-sword, flamberge, which in France had once been used as a synonym for almost any type of sword, became an expression of disdain for a clumsy, outmoded weapon. [3]
Perhaps significantly, one of the most important works, A.V.B. Norman’s The Rapier and Small-Sword 1460-1820, while it discusses various hilt and blade types, does not provide a specific chapter for the “transitional” stage. Norman’s treatment of the changes in guard, however, and how we date them, is informative. Placed next to other discussions, he fills in a lot of the details. [4]
In his chapter “From Rapier to Smallsword” in Swords and Hilt Weapons, Anthony North provides a succinct summary of rapier development. Just prior to his coverage of the smallsword in this chapter, North mentions what he calls “light rapiers,” such as the dish-hilts popular in England in the 1660s, and reminds the reader that many styles coexisted. The title of the chapter is fitting, for as he writes:

The seventeenth century was a most important one in the evolution of the sword in Europe, for by the 1630s the fashion for rapier and dagger play in fencing had considerably declined. A decade later the smallsword, in effect a light rapier, was introduced. In fact, from various advertisements in the ‘lost’ columns of journals such as The London Gazette it seems that, for a while at least, ‘rapier’ and ‘smallsword’ often meant the same thing. The smallsword rapidly became the most commonly worn sword in Europe and in some countries continued its career into the nineteenth century. Since the smallsword hilt developed directly from that of the rapier, it is appropriate that the two weapons should be discussed together. [5]
What is the take away from this short sample of examinations? First, “transitional” rapier might refer to a few different styles of weapon–to different lengths and widths of blade, to different hilts. Second, the period of transition, which includes overlap in style preferences, is centered on the 17th century. Individual hilt styles varied, some coming in the 16th century for example, but for the most part we’re looking at the 17th century. Fourth, and for me most useful, is considering how these weapons were intended to be used. By and large, “transitional” rapier points to use of the sword alone, that is without a parrying dagger, buckler, rotella, or other off-hand options. Moreover, transitional rapiers were focused more on the thrust than the cut, and while many late 17th century treatises still included cuts, some, like Marcelli, did so for completeness and to remind the reader that in some cases they were an option, and some, like Besnard, only include them as harrassing actions in specific instances. Against those who hold the sword with two hands, half-sword style, a cut straight down the blade, whether one’s own blade is sharp or not, will be unpleasant.

It would be unhelpful to include all the options under the title–by that logic smallswords might be considered transitional rapiers too. That isn’t wrong, I don’t think, but it isn’t helpful either. Likewise, Italian, especially Neapolitan, and Spanish systems of the time, had not yet abandoned off-hand options. Marcelli, I would argue, represents later period rapier, but not necessarily “transitional” rapier. Ditto Pallavicini.
I am not an authority on rapier nor on sword styles and development; I’m a passionate enthusiast and fencer, so what follows on what I look to as “transitional” is just my take on things and offered only as suggestions.
A few sources I recommend:
–first and foremost is The Free Master of Arms by Charles Besnard (1653)–it is excellent and provides a very thorough approach in logical progression. Rob Runacres and Anne Chauvet have a delightful dual-language edition published by Fallen Rook Publishing.
–Another master worth examining is Johannes Georgius Bruchius (active in the 1650s)–Reinier van Noort has translated and published his important work. For fans of Fabris and his legacy in northern Europe, Bruchius is a must.
—Alfieri, while he covered a number of weapons, including rapier and dagger, devoted a lot of attention to the rapier alone–his On Fencing (1640), later republished with additional material as The Art of Handling the Sword Well (1653), is excellent.
–the work of André des Bordes, whose Discourse on Theory, Practice, and Excellence at Arms (1610) is considered a French distillation of the upublished the book by Camillo Palladini.
I would love to hear your thoughts on the topic, both the idea of “transitional” rapier, and, the masters you most look to, so feel to message me and we can make this post more of a discussion.
NOTES:
[1] I covered a few of these in the short piece I wrote, “A Brief History of Smallsword,” available here under “Coaches.” Scroll to the bottom and in bold you’ll see “Research, Interviews, and Media.” Click on that and it will take you to a list of articles, etc.
[2] Egerton Castle, Schools and Masters of Fencing: From the Middle Ages to the Eighteenth Century, 1885, Reprint New York, NY: Dover Books, 2003, 238; Ewart Oakeshott, European Weapons and Armour: From the Renaissance to the Industrial Revolution, Woodbridge, UK: The Boydell Press, 2000, 165-166.
[3] E.D. Morton, Martini A-Z of Fencing, London, UK: Queen Anne Press, 1988, 66.
[4] A.V.B. Norman’s The Rapier and Small-Sword 1460-1820, 1980, Reprint Ken Trotman Publishing, 2019, see especially the discussion 43-47.
[5] Anthony North, “From Rapier to Smallsword,” in Swords and Hilt Weapons, New York, NY: Barnes and Noble Books, 1993, 58-71.
The Event we _Need_: Rose & Thorns Historical Fencing Symposium

This weekend I had the pleasure to attend and the honor to present a class at the Rose & Thorns Historical Fencing Symposium, a two-day event composed of classes and various tournaments hosted by the folks at Diamond Rose Academie d’armes, Auburn, California. To say I enjoyed it is understatement—it was extremely well run, the quality of the fencing (beginner and advanced) was impressive, and the hosts were open, friendly, and passionate about fencing. My good friend Alex Spreier (High Desert Armizare), who kindly joined me this weekend, and I found ourselves actually enjoying the bouts—on several occasions we approached the fencers to tell them how much fun it was to watch. This is in no way a dig at Issac and company—from all I could gather pre-event they appeared as delightful as I found them to be in person, but there is sometimes a disparity between great folks and less ideal tournaments. Rose & Thorns, in my view, is the ideal.
Before explaining that, I should state that my notion of the ideal meet consists of quality fencing, education, and camaraderie. Many events feature people who get on well, and many do their best to provide classes, but with few exceptions I’ve not seen the level of fencing skill, beginner to advanced, that I did here, whether in the pools or in pick-up bouts. Caveat: this is not to say that such events don’t exist—I’m assured by friends and one recent reader that there are other high quality examples of solid fencing. I believe that, I do, but this said for the events I’ve not attended some of the footage shared from them has proved the rule (hop and chop, all first intention, no use of measure, etc.) rather than the exception. Put another way, Rose & Thorns is what “HEMA” tournaments should be.
Smallsword and rapier, generally, draw a different crowd. Interest in these weapons overlaps with like-minded enthusiasts in the SCA, among others, and given Diamond Rose’s history (iirc it began as SCA), this isn’t surprising, but at the risk of offending friends of mine in the Scadian orbit, the smallsword and particularly the rapier I saw was, by and large, not what I typically see in the SCA. It says a lot that I could often identify the source a particular fencer favored, and it says more that the fencers in question weren’t merely costumed up and aping the plates, but making effective use of the source material. There was also a healthy mix of people—some clearly classically inspired fencers, some from the sport-rapier/black tiger side, and even—importantly—Olympic fencers with one foot in historical. Among the last, it was a treat finally to meet Christopher Bartlett. He’s a seriously nice chap and an excellent fencer.
The blend of classes and lectures, the division of the hall into a teaching/pick-up bout/vendor side, and competitive sections, was smart. I was not able to do it all, and missed a few options that I should like to have attended, but the classes I was able to attend and the people whom I met and had a chance to chat with, more than made up for it. In particular, I had a chance to meet some people I’ve mostly known via fb, such as Matthew Lawrence, Christian Killingsworth, and Maestro Kevin Murakoshi (Maestro, thank you so much for sharing your recent book acquisitions, and, for introducing me to Itto Ryu). Meeting such wonderful humans is one of the things that makes these events so special.
Thanks to two long days on concrete, and a misstep (my own fault) during Christian’s class on Nicolaes Petter, I had trouble with my hip and so was unable to enjoy some pick-up bouts with Issac and his people, among others, and so here I’d like to add that I collectively owe them a bout or two next time we meet.
Thank you Issac Humber and Diamond Rose for hosting and running such a stellar event. I am honored to have been asked to teach and am grateful to you all, and to those who attended my class on Charles Besnard’s Le maistre d’escrime libéral. The Rose & Thorns Historical Fencing Symposium has joined SabreSlash in Prague (hosted by my dear friend Maestro Michael Knazko) and the excellent Russ Mitchell’s St. George’s Day Exhibition of Arms as one of the events I should like to attend again and which I hope never dies.
Granularity in Teaching Fencing
As so often happens, a student observation yesterday during the first practice session initiated not only a valuable learning moment, but also provided a reminder to me as a coach about the place of detail in teaching technique. How much detail and just when we share it are often part of a balancing act between sufficient explanation to help the student and overwhelming them with too much information. Experience tends to be a good guide to this, but it varies by student, and there are times we misread and unwittingly confuse rather than clarify things.
In discussing a thrust with opposition, the student commented that until that moment he had equated “engagement” and “opposition,” and that this is one reason, so he discovered, that he has struggled to make a glide/glizade work. The two terms can correspond, but they’re different–an engagement merely means that the two weapons are in contact in a specific line; opposition refers to a way of parrying or thrusting that shuts out the opposing steel.
The student, so he shared, had been simply thrusting straight out from guard, say from third, along the blade, but importantly without opposition. In effect, he was only aiding his opponent–performed this way, he was placing the weak of his own weapon into the strong of his opponent’s, basically handing them a parry. It’s not that I haven’t covered how to perform a glide over and over again, because I have, but that the concept hadn’t really solidified for him yet. Both his version and the proper one slide along the other blade, but they do so very differently.
It was a key “a ha!” moment for him, and immediately it changed not only how he fenced yesterday, but how he will fence, how he will drill, from now on. A leftie, the chances of doubling with a glide are greater, because both weapons are in the same plane. Armed with new information, well, better understanding of old information, he was able to adjust his hand to the right height and create the proper parabola to target.
Later, in the hours before my next class, I thought about what had happened. Occasions like this are important and can help us improve our methods. First, I wanted to establish that I had not neglected anything previously. Second, I reviewed my notes for the ways in which I normally introduce this action. One of the things I noticed is that I list terms, but realized that in class I may not always define them or do so adequately. I do my best, but familiarity with the information can blind us to the fact that an “obvious” notion may not be so obvious to others. A similar phenomenon can happen in demonstrating an action–even should we execute it perfectly, students may not understand the finer points that create good execution.
So, for next time, my plan with the glide in a new class is to be sure to define the most important ideas. In this instance, that means making sure they see a distinction between an engagement/contact and the leverage that the glide requires. I will do a better job pointing out the height of my hand, its distance from the line, and how the glide follows a parabola to target. This will bring in other, critical concepts vital for success, from the proper measure to the tempo inherent in the action.

Generally, when we lunge with the glide, the point is lower than the fist, hand just outside our own bodies, angled slightly in, and upon termination of the lunge the hand is somewhere between the chin and nose. Some masters show it higher than that, but it need not be unless one is fighting someone uncommonly tall. It’s normally best to be as efficient as possible. Having engaged the opponent’s weak with our middle, the hand makes a slight arc as we reach for target–this ensures that we maintain leverage for as long as possible, this leverage being vital for opposition. Another way to refer to opposition is that one is “closing out” the opposing weapon, keeping it offline and maintaining that deviation so as not to double.
I’ve used this hastily drawn image before, but it serves well to illustrate the angle from above:

Though in this example the blades are not aligned ideally, one will notice that the fencer at the bottom has their point off-target. Assuming the top fencer shifts measure, either with feet or the arm, to command their weak, then they might perform a glide, and at this angle, the bottom fencer’s point will continue to go off to the left.
The “Point”
This short post is meant to highlight a few things. First, that we always be careful that we explain things well, demonstrate them well, and keep an eye out for problem areas.
Second, the ability to add or remove detail to assist a student is important, but takes time to develop. Start small, start simple. With a more advanced fencer, but new to smallsword or whatever you’re teaching, a lot of basic concepts will likely already be there–in this case it may be demonstrating how the action changes from foil.
Third, very few historical manuals go into great detail or as much as we often need to teach, so a major part of interpretation and implementation is filling in those missing details. This is arguably one of the most important, but dangerous things we do, because we leave the page and have to connect the dots as best we can. For smallsword, given the similarities between it and aspects of traditional foil and epee, this is a little easier to do. However, it remains tentative much of the time, especially for actions that became obsolete. It means constantly checking the details we provide against the text and/or texts which include the relevant action.
We will sometimes get it wrong, but this is part of the process, and if we’re conscientious, honest, and open to correction or new information, we are far less likely to go wrong.
Slides from Interview with Dr. K, 27 Feb. 2024
I had the great pleasure to meet again with my friend Dr. Manouchehr M. Khorasani of Razmafzar TV. This session we explored a bit about using sources in historical fencing–it’s just a cursory, basic look, but slides help so I am attaching them here as a pdf.
The next planned meeting will explore using a specific text in more depth, and, with luck I’ll have someone able to assist me in demonstrating the various things we cover.
Specific Drills & “Realism”
“Show, don’t tell,” was some of the best teaching/writing advice I ever received. To that end, I’m adding some specific drills to illustrate what I shared in the last post on this topic better (https://saladellatrespade.com/2023/10/31/yes-yes-very-nice-but-how-cultivating-defense/ ). Many, if not most of these drills, are venerable—if anything I may have adapted things here or there, but all of what follows are standard drills or types of drills. [1]
These progressive option drills start with a basic action and build in complexity. If a student is new or struggling, one may stop with the first version and work on that, or, aspects of it. For more advanced students, one can add an additional layer of difficulty as required. In the first example, for smallsword, one could simplify the drill even more by having the student initially deny the engagement and break measure. This would observe the “don’t get hit” rule, but not set them up well for a strike of their own.
Two things I didn’t add below, but which apply are first, that it’s important to switch roles, that is, have both the student and instructor initiate the action. This gives the student a chance to act as attacker and defender. Second, movement and varying distance is critical for success. If one starts “firm-footed,” that is, in place, fine, but then add movement. Chase the student, have the student chase the instructor; start out of measure, start in measure. For more advanced students, another option we can layer in is varying tempo and speed.
Drills & “Realism”
On their own, there is little inherent in most drills to make them impart a defensive mindset automatically. All the drills I provide below, for example, can be gamed to current tourney standards easily if one wishes. How “realistic” or not they are depends on explanation and reiterating correct principles over and over and over again within each element of the drill.
One of the most frequent questions I get in drills and lessons, and a good one, is “but why wouldn’t I just do this?” This simple question has become one of the single most important ways in which I push correct mindset. To cite one example from this past week, one student in a smallsword class asked me why they couldn’t just disengage and thrust against the glide in third. I told them that they could, but then asked what would happen if they did—what is the opponent doing? If the opponent is gliding to target, and one ignores that to strike… one is still hit. Not good enough. IF one wishes to disengage in response, fine, but don’t do so into absence, do so with opposition in the new line, a shift of the body to one side, or both. [2]
Ex. for Smallsword:
Option Drill with the Glizade/Glide in Third
To Start:
S [student]: in guard of third
I [instructor]: in guard of third
*engaged on the outside line
Option 1A: Student Attacks
- S: finds measure and gains weak of I’s blade with middle of own [3]
- S: performs glide in 3rd, maintaining opposition, and strikes target (forward target or chest)
2A:
- S: finds measure and gains weak of I’s blade with middle of own
- S: performs glide in 3rd, maintaining opposition, and thrusts
- I: parries 3rd, ripostes; S. parries in 3rd and ripostes [4]
3A
- S: finds measure and gains weak of I’s blade with middle of own
- S: performs glide in 3rd, maintaining opposition, and thrusts
- I: parries 3rd, begins riposte; S. disengages, engages in 4th, thrusts to target with opposition
4A:
- S: finds measure and gains weak of I’s blade with middle of own
- S: performs glide in 3rd, maintaining opposition, and thrusts
- I: makes dérobement to avoid glide and engages in 4th
- S: via circular 3rd, retakes line and glides in 3rd to target
Option 2A: Instructor Attacks
- I: finds measure and gains weak of I’s blade with middle of own
- I: performs glide in 3rd, maintaining opposition, and thrusts
- S: parries 3rd, ripostes
2A:
- I: finds measure and gains weak of I’s blade with middle of own
- I: performs glide in 3rd, maintaining opposition, and thrusts
- S: parries 3rd, begins riposte; S. disengages, engages in 4th, thrusts to target with opposition
3A:
- I: finds measure and gains weak of I’s blade with middle of own
- I: performs glide in 3rd, maintaining opposition, and thrusts
- S: makes via dérobement avoids glide and engages in 4th
- I: via circular 3rd, retakes line and glides in 3rd to target
- S: parries in 3rd, ripostes
Ex. for Rapier:
Finta Scorsa or Advancing Feint of Marcelli
To Start:
- S: in guard of prima
- I: in guard of third
Option 1A: Student Attacks
- S: in prima, makes false attack to the high inside line
- I: parries in 4th
- S: via cavazione /disengages to outside line, and strikes target (forward or chest)
2A:
- S: in prima, makes false attack to the inside line
- I: parries in 4th
- S: via cavazione /disengages to outside line; I parries 3rd, begins riposte
- S: parries in 3rd (or 4th depending) and ripostes, striking target
3A
- S: in prima, makes false attack to the inside line
- I: parries in 4th
- S: via cavazione /disengages to outside line; I parries 3rd, begins riposte low-line
- S: takes 2nd, ripostes with opposition
4A:
- S: in prima, makes false attack to the inside line
- I: parries in 4th
- S: via cavazione /disengages to outside line; I parries 3rd, begins riposte low-line
- S: takes 2nd and thrusts; I. parries 2nd, begins riposte
- S: parries 2nd, ripostes with opposition
Option 2A: Instructor Attacks
- I: in prima, makes false attack to the high inside line
- S: parries in 4th
- I: via cavazione /disengages to outside line, and thrusts
- S: parries in 3rd, ripostes to target
2A:
- I: in prima, makes false attack to the inside line
- S: parries in 4th
- I: via cavazione /disengages to outside line; S. parries 3rd, begins riposte
- I: disengages to 4th, starts riposte with opposition
- S: disengages to 4th, ripostes with opposition to target
3A:
- I: in prima, makes false attack to the inside line
- S: parries in 4th
- I: via cavazione /disengages to outside line; I parries 3rd, begins riposte low-line
- S: takes 2nd and thrusts; I. parries 2nd, begins riposte
- S: parries 2nd, ripostes with opposition
- I: with parry in 2nd, passes left foot forward in order to seize guard
- S: steps back, attacks to body
Ex. For Rapier and Dagger:
Working from Mezzaluna (Marcelli)
To Start:
- S: in guard of mezzaluna
- I: in fourth guard [5]
Option 1A: Instructor Attacks
- I: in fourth guard, makes attack to the inside line
- S: parries with dagger; with sword ripostes to target (forward or deep)
2A:
- I: in fourth guard, makes false attack to the inside line
- S: attempts to parry with dagger (downwards and out)
- I: disengages to strike hand
- S: parries with dagger (upwards and out), ripostes with sword to target
3A:
- I: in fourth guard, makes beat attack against sword to open the inside line
- S: parries in 4th to close line, ripostes with opposition
- I: parries with dagger (upwards and out), ripostes with sword inside line
- S: parries with dagger (downwards and out), ripostes to arm
Option 2A: Student Attacks
- S: makes false attack to face
- I: parries with dagger (upwards and out)
- S: disengages and strikes arm or hand
2A:
- S: makes false attack to face
- I: parries with dagger (upwards and out); ripostes to arm
- S: disengages and strikes to arm or hand
- I: parries with dagger, ripostes
- S: parries with dagger (downwards and out); ripostes to arm
3A
- S: makes false attack to face
- I: parries with dagger (upwards and out); ripostes to arm
- S: makes circular parry in 3rd; ripostes via glide to outside line
- I: parries in 3rd, checks with dagger, ripostes in high line over engagement [6]
- S: parries with dagger (upwards); shifts right, ripostes to body
Ex. for Sabre:
Options from an Engagement in Second
S &I: in 2nd, at punta spada/last third/weak of the sword; then, start out of distance
Option 1A: Student Attacks
- S: cuts over to threaten face with feint via half thrust
- I: moves to parry in 1st
- S:
a. performs molinello ristretto or coupé to the arm [7]
b. performs molinello ristretto via rising cut to the bottom of the arm
2A:
- S: cuts over to threaten face with feint via half thrust
- I: moves to parry in 1st
- S: performs molinello ristretto via rising cut to the bottom of the arm
- S: secondary attack: pushes through to thrust or cut flank
3A:
- S: cuts over to threaten face with feint via half thrust
- I: moves to parry in 1st
- S: a. performs molinello ristretto or coupé to the arm
- I: parries 3rd, cuts to head
- S: parries 5th, cuts via molinello to head
4A:
- S: cuts over to threaten face with feint via half thrust
- I: moves to parry in 1st
- S: performs molinello ristretto via rising cut to the bottom of the arm
- S: secondary attack: pushes through to thrust or cut flank
- I: parries in 2nd; ripostes via thrust
- S: makes ceding parry in 2nd, ripostes via thrust to target
Option 1A: Instructor Attacks
- I: cuts over to threaten face with feint via half thrust
- S: moves to parry in 1st, parries via molinello to head
2A:
- I: cuts over to threaten face with feint via half thrust
- S: moves to parry in 1st
- I. disengages and cuts to arm
- S: parries 3rd, cuts head
3A:
- I: cuts over to threaten face with feint via half thrust
- S: moves to parry in 1st
- I. disengages and cuts to arm
- S: parries 3rd, cuts head
- I: parries 5th, cuts to flank
- S: parries in 2nd, thrusts to target
NOTES:
[1] To name one example, and analogous to the first one I share here, there is the discussion of options facing an opponent in 4th in Charles Besnard, Le maître d’arme liberal, 1653, 43 (63 [orig. French] and 161 [English] in the translation by Anne Chauvat and Rob Runacres, The Free Master of Arms, Glasgow, UK: Fallen Rook Publishing, 2022).
[2] The use of the inquartata or demi-volte, for example, would work in this instance.
[3] Two ways to vary this are to have the student find measure by a short extension of the arm from critical distance, in order to gain the weak with the middle of their weapon, or, have them step into measure to engage. The first is more conservative, but the second option is important—ideally, students learn to find measure and exploit it both ways.
[4] As set up here, the final actions are a battle of ceding/yielding parries and glides. Both help students cultivate better awareness of presence, varying pressure, measure, and opposition.
[5] Marcelli’s fourth guard for rapier and dagger is depicted thus:

Mezzaluna, on the right, needs explanation. Chris Holzman points out that Terracusa e Ventura (1725) remarks that the tips of the two weapons are close enough to form a “half moon” shape. Here, there is a much wider gap between them. The accompanying text, however, tells us that the fencer “carries the dagger forward covering all the upper parts in such a way that the opponent only sees the chest below the dagger as target to strike.” [Holzman, Marcelli, Rules of Fencing, 1686, Wichita, KS: Lulu Press, 2019, 273; see also n. 115 that page.
Hà portato il Pugnale avanti, coprendosi tutte le parti superiori, di modo che il nemico vedesolo per bersaglio da colpire il petto per le parti di sotto il Pugnale [Marcelli, Regole della Scherma, Lib. I, Cap. III, 4]
[6] Here, the instructor, having parried the incoming sword in 3rd, uses the dagger to hold the opposing weapon in place in order to swing their weapon around obliquely to the right and up (assuming a right-hander) in order to threaten the face.
[7] The coupé , in Radaellian sabre as taken down by Del Frate, is also known as the colpo di cavazione or cavazione angolata. It is made by bending the forearm back a bit to increase power. Chris Holzman, in his gloss, remarks that it’s similar to the last step of the molinello. See Christopher A. Holzman, The Art of the Dueling Sabre, Staten Island, NY: SKA Swordsplay Books, 2011, 234.
